
Branch previews with Google App Engine and GitHub Actions
leveraging GitHub Actions for easy-to-use, automated branch preview deployments
- 12 minsWhen I started working remotely part-time for Sumus, my role was primarily as a software developer on an investor portal they wanted to build. I wasn’t starting from scratch - there was already a sizable codebase going, and a simple nonautomated deployment set up on Google App Engine.
Right off the bat I had a number of tech-debt-related issues I wanted to address before I started developing new features, one of which was automating this deployment process. App Engine does not seem to have a great way of doing this outside of using Google’s source control product, so I decided to do this myself.
As I progressed on the automation of the App Engine deployment, I realised branch previews were not that much more of a hassle to set up, so I got those up and running as well - Heroku has a nice article about why staging environments are nice to have. This blog post will cover some of the work I did on this front, and hopefully give a good idea about how you can go about creating a similar setup for your own projects if you want. Our project consists of a React frontend serviced by a Node.js backend, so my post will lean a bit towards that particular setup, but should apply to a variety of different stacks.
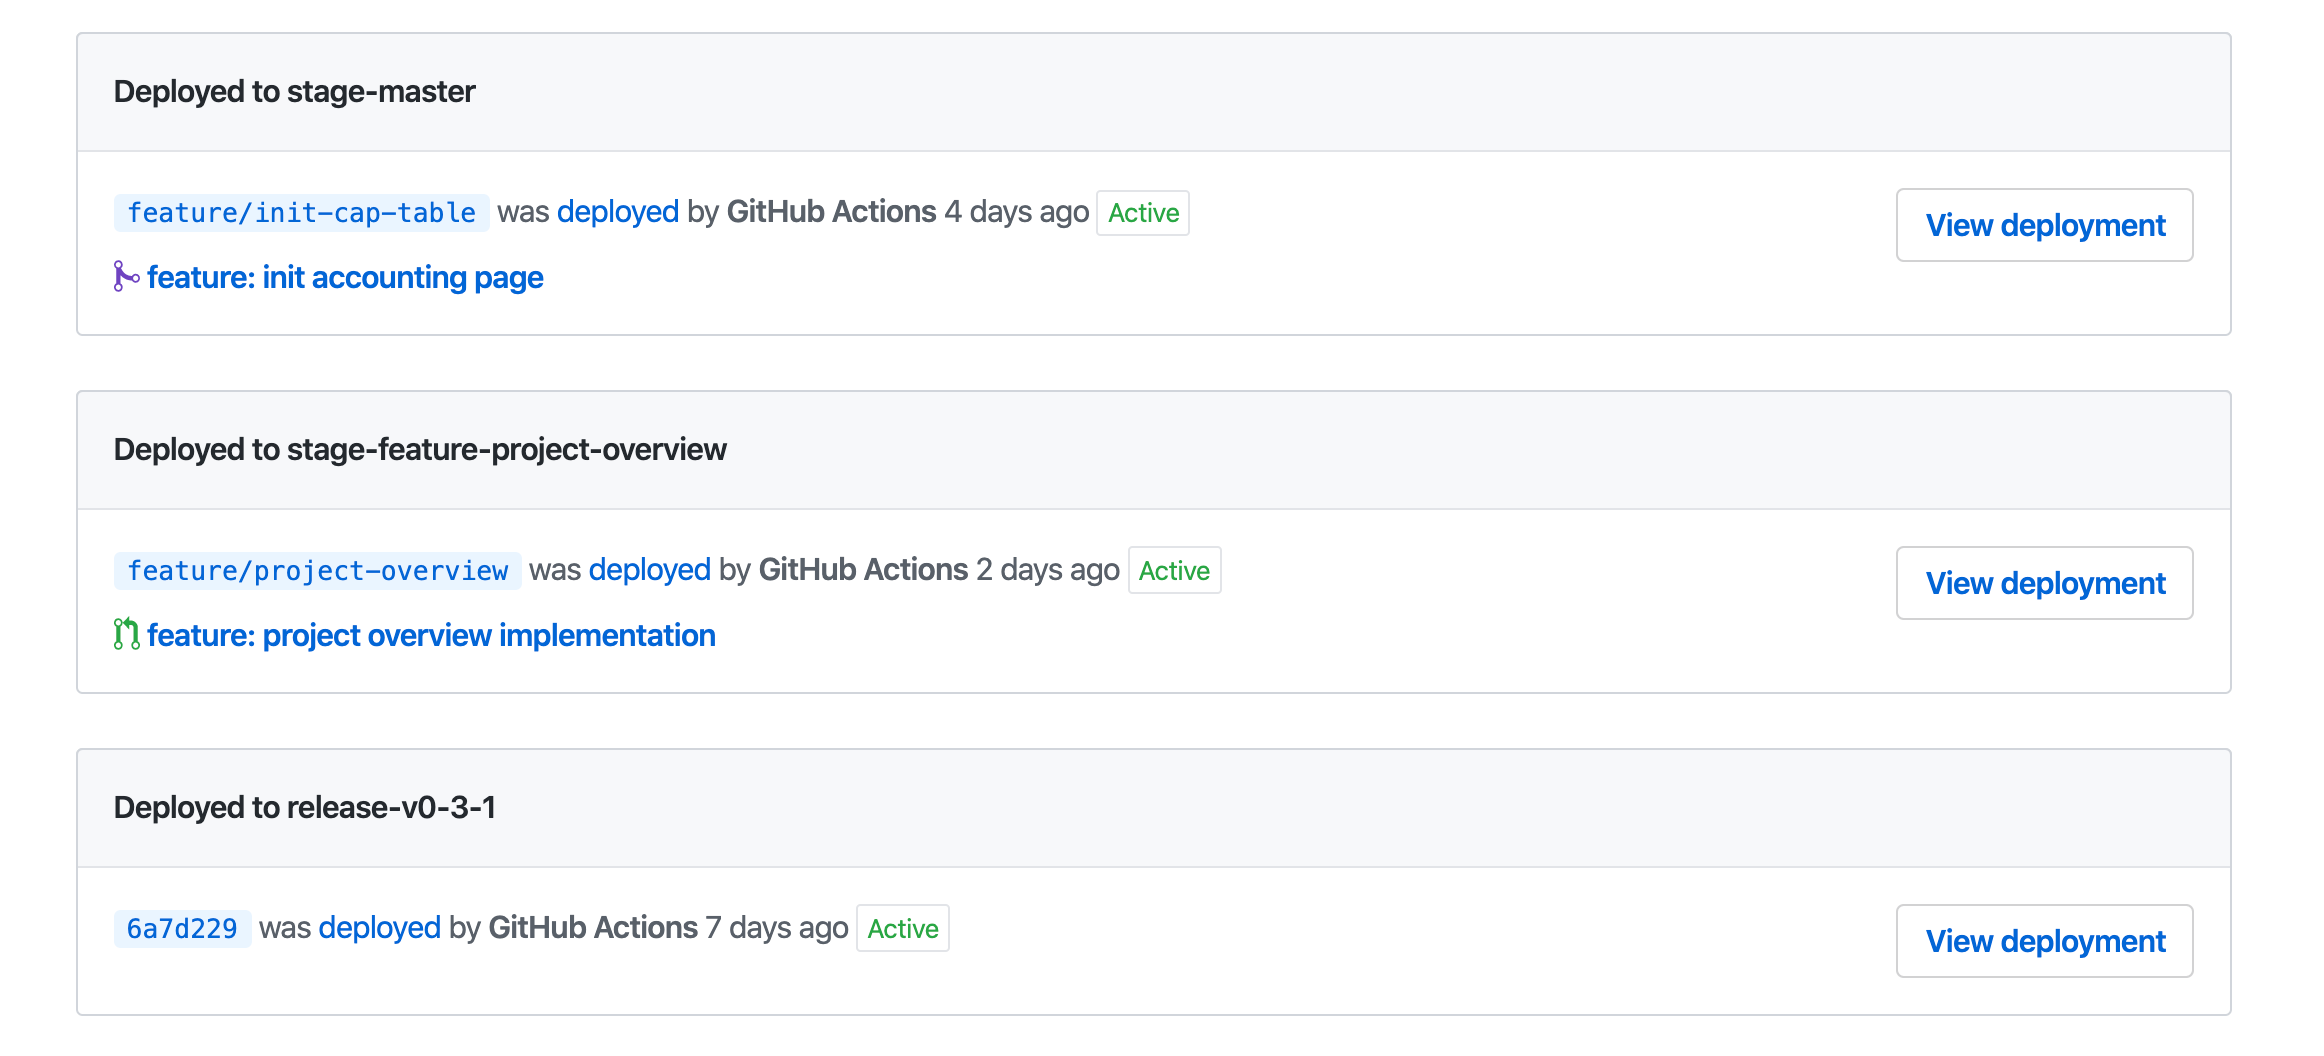
Here’s a sneak peak of the end result:
# The Problem
First off, a quick intro to App Engine. This was my first encounter with App Engine, so this won’t be the best rundown, but in a nutshell App Engine seems like a reasonably priced way to deploy your application in a serverless fashion with the flexibility to scale to your needs. It also offers nice out-of-the-box integration with Google’s other monitoring offerings, which is a nice plus.
Most of the official documentation seems to indicate that deployment happens primarily through:
- defining an application specification, the
app.yaml - using the
gcloudCLI to push a deployment out from your copy of the codebase
The old process for deploying our application involved making sure I had all my credentials and stuff set up, and running:
gcloud app deploy app.yaml
There was no real way short of making sure I wasn’t axing someone else’s deployment or notifying everyone of what is currently active short of shooting a Slack announcement and hoping it’s seen and handled appropriately. I felt like the entire process would be more comfortable if it was automated and tied to source control, so that:
- permissions are easier to manage as the team grows
- it’s easier to tell what is deployed, and where
- less work to continuously update and manage deployments
# Solution
I didn’t actually start off with leveraging GitHub Actions for automating this process - my first iteration used CircleCI, where we run our tests, style checks, and and so on. This had the advantage of allowing me to stage deployments based on whether or not previous checks pass:

Unfortunately this was eating up a huge chunk of our pipeline minutes - as you can see in the image above, the appengine_stage job takes more than 97% of each build when a branch is configured to stage. This brought us uncomfortably close to hitting the CircleCI free tier, so I ended up moving it to GitHub Actions to split up our workloads.
# Staging and Release
I first ran into the concept of branch previews working on the UBC Launch Pad website, where we leveraged Netlify’s great branch preview feature. It was a fantastic way to do some live testing and get feedback quickly, so I leveraged branch previews again during my time with nwPlus working on the nwHacks 2019 website, where I used a tool I worked on, ubclaunchpad/inertia, to quickly stage previews for the nwPlus design team to provide feedback on.
Now that I’m back to working on websites, I figured branch previews would come in useful here again (and they have so far!). To accommodate this, I introduced some extra steps to our deployment flow:
-
Staging deployments are primarily for previewing branches. By default, the only staged branch would be
master, but additional branches can be staged by adding the desired branch to the GitHub Action configuration. These deployments are named based on their branch, i.e.stage-masterorstage-my-branch. -
Release deployments are for deploying tags. These deployments are promoted (unlike the staging deployments) such that all traffic to the application route to the most recent release deployment by default. These are named based on their tag, i.e.
release-v0-3-0.
# Versioning Frontends and Backends
A bit of a conundrum when deploying multiple versions of a multi-component service is making sure that they talk to the correct instances - for example, a branch preview deployment probably does not want to have its frontend talk to the backend of a different deployment if you are trying to demonstrate a new feature.
For service-to-service deployments, this is fairly straight forward - App Engine provides a variety of default environment variables you can use to interpret the appropriate backend to talk to. We can take advantage of how App Engine addresses un-promoted deployments:
https://${version}-dot-${project}.appspot.com # unpromoted
https://${project}.appspot.com                # promoted
In a multi-service setup, you also get an additional ${component} piece attached to the address:
https://${version}-dot-${component}-dot-${project}.appspot.com # unpromoted
https://${component}-dot-${project}.appspot.com # unpromoted
Then, following by using a “versioning” scheme of version=branch_name, we can easily determine where the desired service should be located, and point our requests to the correct address.
The only hurdle to this is for frontends. We have to know the version at buildtime, which sadly App Engine’s default build feature does not provide, so you’ll have to either:
- generate a
.envfile to be consumed at build time and upload it with your build - build in CI with the appropriate variables
The latter is probably best practice anyway, since you want to optimise your App Engine setup for fast instance start times, but in case you are running your builds in App Engine (our deployments were previously) this is a minor hurdle to be aware of.
# Automation
# GitHub Actions + App Engine
GitHub Actions is a pretty new product, which I guess is probably GitHub’s answer to GitLab’s CI/CD features. I’ve come to like it a lot more for anything outside of running your tests and whatnot, since it has a lot of interesting hooks and triggers based on normal GitHub activity that you can leverage, but for this example I won’t be using many of those. If you’re following along you might want to consult the official workflow syntax documentation.
Anyway, to get started I set up a staging workflow:
# .github/workflows/appengine-stage.yml
name: appengine-stage
on:
  push:
    branches:
    - master
    # insert branches to stage here
All I really want to do here is declare what branches I want to stage, and make staging additional branches just a matter of adding it to the configuration in your PR (and removing it when you’re done). I’m thinking of using PR labels for this, but haven’t figured out a good way to do it yet.
The first step is to actually grab your branch name. GitHub only provides you with the commit’s reference, which takes the form of:
refs/heads/${branch_name}
So we’ll want to extract it with a script:
steps:
- name: Extract branch name
  id: get_branch
  shell: bash
  run: echo "##[set-output name=branch;]$(echo ${GITHUB_REF#refs/heads/} | tr / -)"
There’s a couple of things going on here:
-
[set-output name=branch;]uses GitHub Actions’ ability to set an output for a step to allow other steps to access the extracted branch -
${GITHUB_REF#refs/heads/}trims off the leadingrefs/heads/bit of a reference -
echo ${...} | tr / -pipes the branch name totrwhich then replaces all slashes with dashes (App Engine does not allow slashes in version names, and I have a habit of using them)
Then, in other steps you can access the branch name like so:
stage-${{ steps.get_branch.outputs.branch }}
All that’s really left to do is run the deployment.
- uses: actions-hub/gcloud@268.0.0
  env:
    APPLICATION_CREDENTIALS: ${{ secrets.GCLOUD_SERVICE_KEY }}
  with:
    args: app deploy client/app.yaml server/app.yaml --no-promote --quiet --version stage-${{ steps.get_branch.outputs.branch }}
The release workflow is very similar, except it runs on releases and generates version names based on the tagged version:
# .github/workflows/appengine-release.yml
name: appengine-release
on:
  release:
    types: [ published ]
jobs:
  release:
    # ...
    steps:
    - name: Extract tag name
      id: get_tag
      shell: bash
      run: echo "##[set-output name=tag;]$(echo ${GITHUB_REF#refs/tags/} | tr . -)"
I also have a separate workflow for pruning previews. Since previews are typically set up for pull requests, the prune job runs when pull requests close (ideally it should be on branch deletion, but there doesn’t seem to be a simple trigger for that at the moment):
# .github/workflows/appengine-prune.yml
name: appengine-prune
on:
  pull_request:
    types: [ closed ]
jobs:
  prune:
    # ...
    steps:
    # ...
    - uses: actions-hub/gcloud@268.0.0
      env:
        APPLICATION_CREDENTIALS: ${{ secrets.GCLOUD_SERVICE_KEY }}
      with:
        args: app versions delete stage-${{ steps.get_branch.outputs.branch }} --quiet
# GitHub Deployments
⚠️ WARNING: Please make sure you pin usages of
bobheadxi/deploymentsbelow to a specific version! The usage examples in this article may not be up to date - please see the Action usage docs for more details: GitHub Deployments Action
As a bit of a stretch goal, I wanted to be able to see the deployments within the GitHub UI, just like with the Netlify branch previews. For example:

There’s another example of this at the top of this article. It’s mostly a small quality of life thing, but the more I thought about it the more I wanted it so…
Anyway, this feature is called “GitHub Deployments”. I tried a bunch of available Actions from the marketplace, for working with this, but for some reason I couldn’t really get any of them to work the way I wanted, which is to:
- create a new deployment
- set a status for it
- change that deployment’s status
- replace the previous deployment’s status
I was probably holding them all wrong, but after a few hours I just went ahead and wrote my own Action, bobheadxi/deployments, for doing exactly what I wanted. Then all I had to do was add a step before and after each of my workflows:
jobs:
  deploy:
    steps:
    - uses: bobheadxi/deployments@master
      id: deployment
      with:
        step: start
        token: ${{ secrets.GITHUB_TOKEN }}
        env: release-${{ steps.get_tag.outputs.tag }}
        transient: true
        desc: Setting up staging deployment for ${{ steps.get_tag.outputs.tag }}
    # ... as before
    - name: Update deployment status
      uses: bobheadxi/deployments@master
      if: always()
      with:
        step: finish
        token: ${{ secrets.GITHUB_TOKEN }}
        status: ${{ job.status }}
        env: ${{ steps.deployment.outputs.env }}
        env_url: https://release-${{ steps.get_tag.outputs.tag }}-dot-project.appspot.com
        deployment_id: ${{ steps.deployment.outputs.deployment_id }}
For pruning, I needed to be able to go and deactivate all deployments associated with the preview environment. Since I owned the action I just added the feature.
- uses: bobheadxi/deployments@master
  with:
    step: deactivate-env
    token: ${{ secrets.GITHUB_TOKEN }}
    env: stage-${{ steps.get_branch.outputs.branch }}
    desc: Deployment was pruned
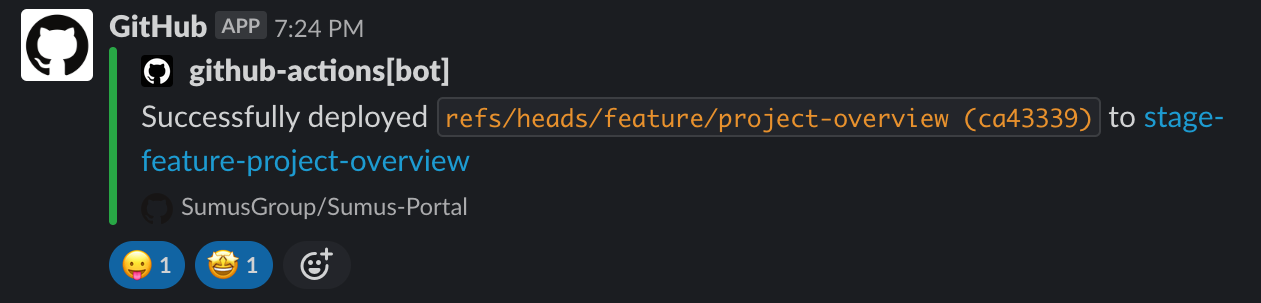
And that was it! As a bonus, notifications for these deployments show up in Slack via the GitHub integration:
# Wrap-up
There’s definitely a bunch of caveats in this approach, and if the resources are available to you it might be easier to use a platform like Heroku to do all this hard work for you. That said, this was a fun hack and has made staging previews for the team to assess and rolling out releases a lot safer-feeling and less of a hassle.